Natural Language Understanding (NLU) often requires raw text to work on. Most tools designed to perform NLU tasks (such as entity recognition and extraction, disambiguation of terms, sentences analysis, text classification, sentiment analysis, …) require raw text as an input. However, getting access to the raw text content of documents can be relatively tricky to do and may require a lot of manual work (copy pasting the content from word, excel, pdf, power point, and other documents).
Datafari can help you performing this tedious task and extract the text from a lot of document types into raw text files. We will see step by step how to do that using the datafari docker container available on docker hub (you can follow along if you are using a self installed version of Datafari as most of the commands and actions are not specific to Docker).
Hardware Requirements
To prevent any crash or job stopping because of a lack of resources, we recommend that you have 8GB of RAM available for the docker container to use (the hosting machine should thus probably have more than that).
You will also need enough disk space to store the raw text extracted from all the files. From our experience, this should represent between 5% and 10% of your original files size (considering you have a mix of document types) in a context of “corporate” documents. This is a rough guideline based on our observations, you may need way less or more space depending on your specific use case.
Downloading and running the Docker container
First, you need to install docker on your machine. Have a look at the docker website and documentation to see how to set it up in your environment: https://www.docker.com/get-started
We are using docker on a machine running Ubuntu, therefore all docker related commands will be presented with this system in mind. Adapt to your system when applicable, although you should be able to run those commands from any system using the right command line tool.
Getting the docker image
The docker image for Datafari is available on docker hub: https://hub.docker.com/r/datafari/datafari/
Get the image from docker hub using the proper pull command:
docker pull datafari/datafari
Starting a docker container from the image
If you plan on extracting the content of a large corpus, you should consider having a look at how to create and use a volume with docker. This will allow you to save the output directly on a directory on your host machine. You won’t have to copy the output from the docker container to your host machine and thus overall save space and time. A good place to start looking about how to this is here: https://docs.docker.com/storage/volumes/
WINDOWS USERS: Follow the instructions on the Docker Hub page to increase the amount of RAM assigned to your container, we recommend using 8GB.
The default command to run a docker container from the image is the following (add the volume parameters if you are using one):
docker container run --name datafari -d -p443:443 -p5601:5601 datafari/datafari:latest
This command is valid for the datafari 5 version of the image, at the date of writing of this blog (June 2021). Refer to the docker hub page for the proper command as this may change at some point and the docker hub page is the reference.
You should have a docker container up and running with Datafari started inside. You can check that the container is up using:
docker ps

You can open your web browser and go to https://127.0.0.1/, you will be warned that the site certificate is self signed, discard the warning and proceed and you should land on the Datafari search engine home page.
The container is up and running with Datafari, we can now do the configuration to extract the text from the files.
Putting the Files Into a Shared Directory
Datafari needs to have access to the files. Datafari can connect to a lot of sources, but to make things simple we will store the files in a windows shared directory. If you are using Linux or Mac, please look on the web to learn how to install and configure a samba share to serve your files; the explanations below are for Windows users.
If you are a Windows user, you can go to the root folder holding your files, right click it and go to properties. Within the properties screen, head over to the sharing tab
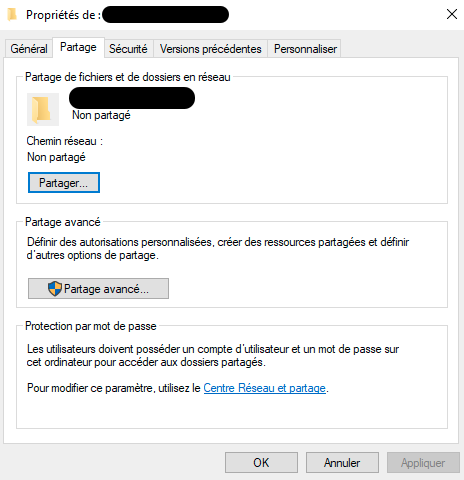
There click on the Share button in the upper section
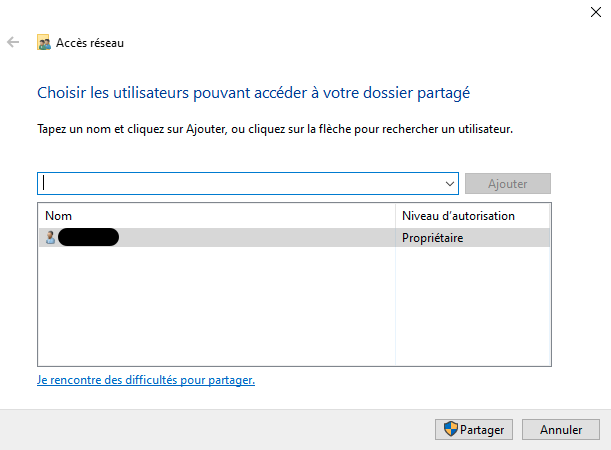
It should be prefilled with your username as the owner of the folder, go ahead and click share.
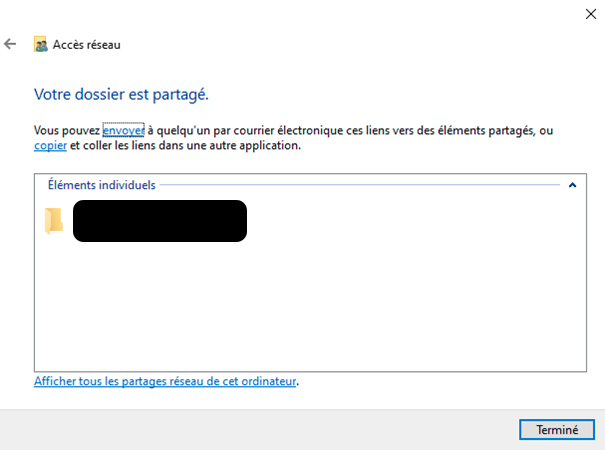
You should end up with this screen giving you the path to the share directory. Keep this information for the configuration later.
For the rest of this tutorial, we will consider the following path “\\MyComputer\MyFolder”.
You can stop the sharing of the folder once you are done extracting the text by clicking the advanced sharing button in the second section of the sharing tab in the property screen of the folder. Once there, uncheck the “share this folder” checkbox at the top and confirm your choice.
Next, go to the network and sharing center and make sure you activated files and printer sharing
Make sure you are on a trusted network, and do not activate files and printers sharing on untrusted networks unless you know what you are doing. If you are not using it beyond the scope of this tutorial and the feature was off, consider switching it back to off once you are done with your text extraction.

You are done with the configuration of the folder, we can proceed to configure Datafari.
Datafari Configuration
Installing the Windows Share Connector Required Library
Because of licences incompatibility (Apache v2 / LGPL), the Datafari docker image can not be shipped with the windows share connector library pre-installed.
You will need to open a console into the running container to install it, to do so run (that is if you used datafari as the name for you container, which is what is proposed by the documentation):
docker exec -it datafari bash
Then follow the “CASE 2 : you have an existing Datafari running” of the following documentation to install it: Add the JCIFS-NG Connector to Datafari - Community Edition.
Setting Up the Job Backbone
To setup the job responsible for the text extraction, we will take advantage of Datafari’s simple job creation interface. It will create the backbone of the job and we will then edit only the parts we need to export the raw text to files.
Head over to the Datafari homepage at https://127.0.0.1
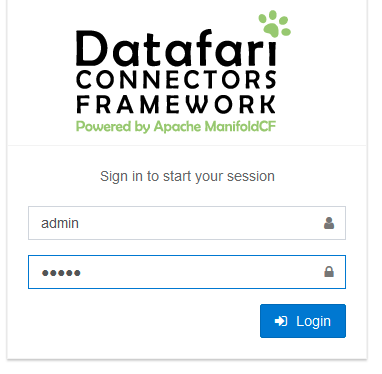
Click on the login button on the top right and login as admin (the password is admin too).
Then go to the Admin menu on the top right and choose Main:
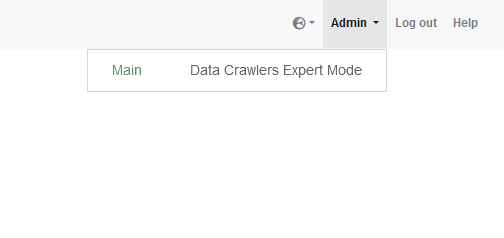
On the page you land on, on the left click on Connectors and then Data Crawlers Simplified Mode:
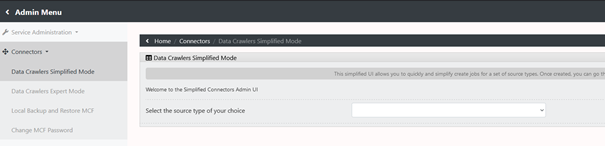
Then choose “Create a filer job” from the drop down:
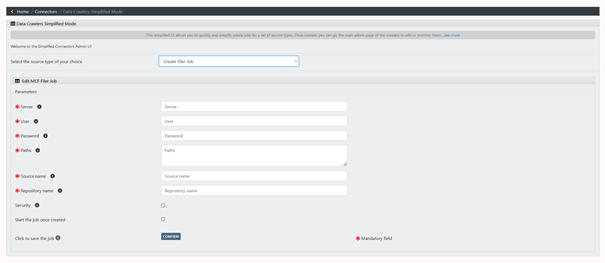
There fill in the required information (examples below consider the usage of a windows machine with a shared folder configured as described above, adapt to your case if you are using a samba share server):
Server: The ip of your computer (or your samba share, can be a domain if the server has one – like shareserver.mydomain) For windows users, you can find the IP in the network and internet properties panel, then clicking on the properties button near the connection you are using and going at the bottom of the screen.
User: Your windows account name (or the username you set up on your samba share server)
Password: Your windows user password (or the password you set up for your samba user)
Paths: The path to the shared directory we created stripping the computer name. For my example is “MyFolder” (the complete path was \\MyComputer\MyFolder, i’m stripping the computer name).
Source name: you need to put a name for the source although it will not be used for our specific use case. Please avoid whitespaces and special characters.
Repository name: Same as the source name.
DO NOT CHECK THE TWO CHECKBOXES AT THE BOTTOM
Click on the “Confirm” button.
You should get a success notification at the bottom with a link you can click on:

If you could not click on the link in the notification, simply click on “Data Crawlers Expert Mode” on the left panel.
You will end up on an authentication page in which you can login as admin/admin again:
If you come from the success notification link you will endup in a page displaying your job (otherwise you will be on a default page):
Modifying the Job to Output the Raw Text Content to Files
By default, a job created with the simplified mode sends the extracted text to the Datafari search enging. So we need to configure an output connector that outputs the text content to a fil,e and then assign and parametrize it for our Job.
Configure a new output connector
Click on the Outputs section on the left and then on the List Output Connections menu entry:
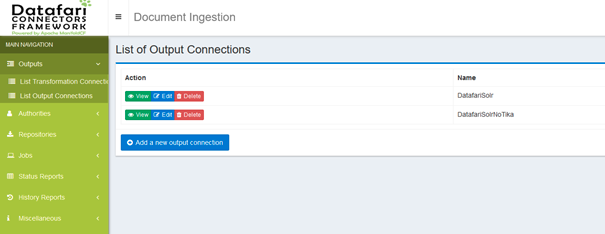
Click on the Add a new output connections button at the bottom of the table:
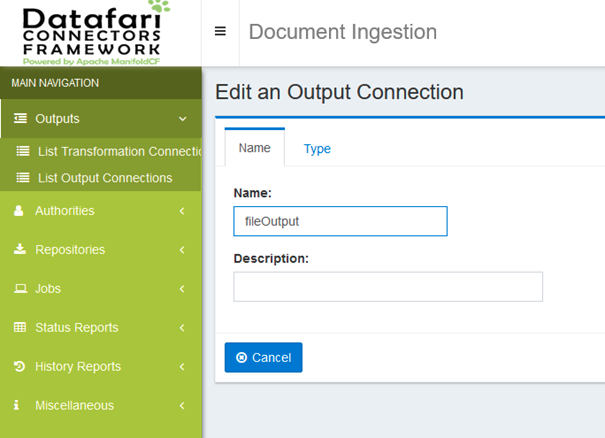
Name your output connection and then go to the type tab:
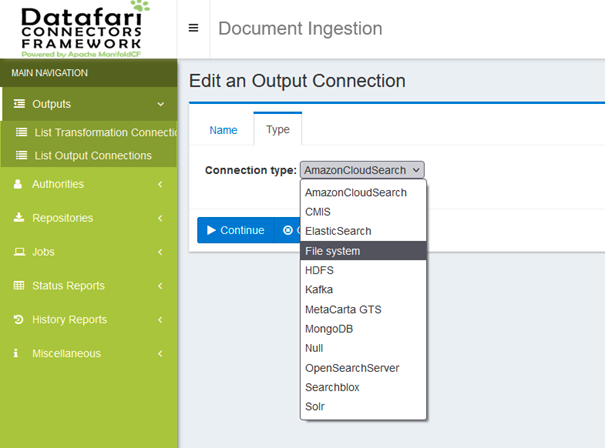
In the type dropdown select “File System” and then click the continue button at the bottom:
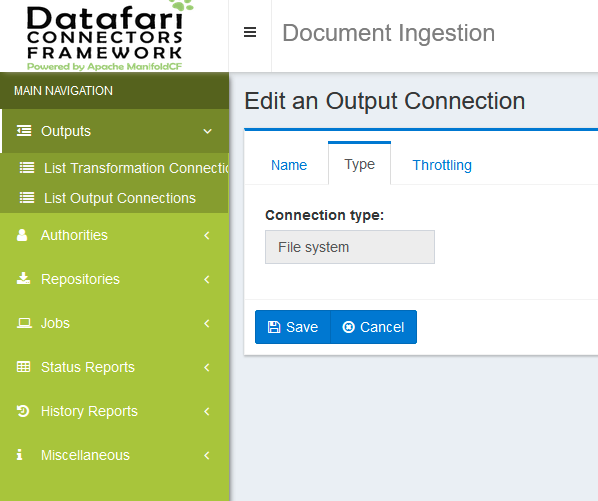
Finally click on the save button:
The output connector is ready.
Modifying the job to use the new output connector and choosing where to store the output
Click on the Jobs section on the left panel and then on the List all Jobs entry.
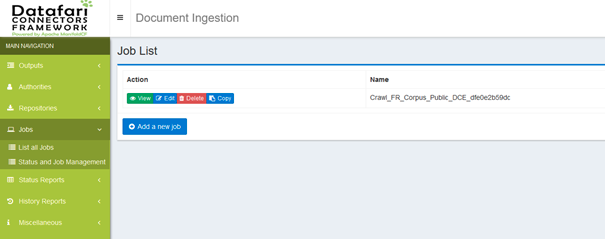
There should be only one job available, go ahead and click the edit button of that job:
Avoid clicking buttons left and rights from here on as you could mess up the job configuration badly if you do not know what you are doing.
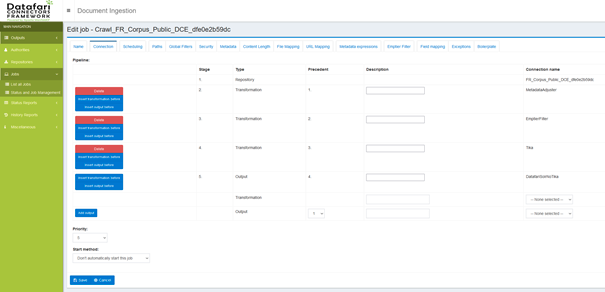
At the bottom right of the table, in the drop down on the last Output row, select the name of the output connector we just created (“fileOutput” in our case).

Then click on the button “Insert Output Before” on the DatafariSolrNoTika output line:

Now click on the red Delete button on the DatafariSolrNoTika output line:

Go to the Output Path tab at the top:

And there enter the path to the folder in which you want the text files to be written. If you are using a container, the following lines will allow you to properly setup the path:
Connect to the container shell, create a directory and change the owner to the datafari use:
docker exec -it datafari bash
mkdir /home/datafari/output
chown datafari /home/datafari/output
Then click Save.
The folder must exist and be writable by the datafari user in the container
If you are using a volume to write directly to your host, use the path pointing to your volume but make sure the datafari user can write there.
After clicking save, you end up with a screen showing all the information about the job parameters.
We should be ready to launch our job. However, before doing so, we will verify that our connection to the File share is working properly.
Verification Before launching the Job
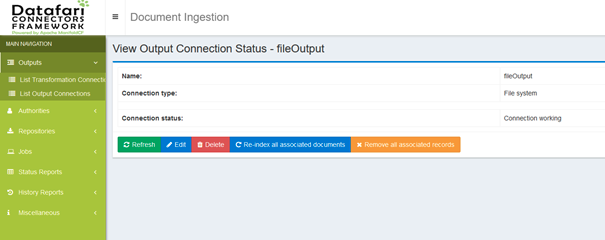
Head to the Repositories section on the left panel and click on the List Repository Connections menu entry.
There should be only one entry in the list, click on the view button for that entry and check at the bottom that is says Connection Working in the Connection status section:

If it does not, there is something wrong:
you messed up somewhere in the basic configuraiton of the job, either with the server address, or the username or the password (the actual path of the folder has no importance for this verification). You can change these by clicking the edit button and going into the server tab. Please only change server, username and password. If you set up your own Samba server, consider checking the samba protocol version it uses and change it but else you should not need to modify that.
Click the save button after your modifications else they won’t be taken into account
Your shared folder (or samba share) is misconfigured and can not be accessed
Launching the Job
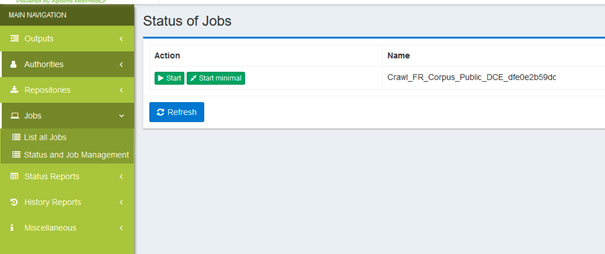
Once you have a connection working status, go to the Jobs section on the left bar and then on the Status and Job Management menu entry:

There you can go ahead and click on the start button. The job should go into the starting state and tracking information should initialize.
Be aware that the tracking information and job status will not update automatically. You must manually click on the refresh button to get updated information. Wait a few second between clicks to avoid unnecessary stress on the system. When the system is busy the update may take a few seconds (or more if it is really really busy).
Your job is now running, and is busy extracting the text from the files. Prevent your machine from getting into sleep mode or from shutting down for the duration of the process. You can leave it running and come back later to check the status from time to time.
Accessing the Text Files
Once the job is done, you can access the files containing the extracted text in the folder you designated into the container.
If you were using a docker volume, the output files should already be accessible in your host machine.
Else, if you want to copy those from the container to your host machine you can use the following command (change path/to/host/folder to the destination folder of your choice):
docker cp datafari:/home/datafari/output /path/to/host/folder
The files in the folder kept the directory structure of the source as well as the file names in the source, including the extension. However, they are raw text files (even if the extension if pdf, docx or anything else) and should be opened with a text editor.
Limitations
The default job configuration of Datafari limits the amount of text that can be extracted from a file. It also discards compressed container files (zip, tar.gz, …) or large files from the pipeline for stability and to avoid risks of saturating the disks. You may want to search in the documentation the following pages that list the limitations in place, and decide by yourself whether to remove or modify them. You can also reach out to us through our github discussions page: Discussions · francelabs/datafari · GitHub